Tuesday, September 10, 2013

Homebrew Bash!

Well it's been a long time since my last post. And this will be the last for even longer. First and foremost, I've moved to San Francisco and won't have a lot of space or time to brew for the next 3 months.

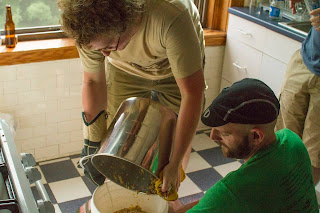
However, I went out with quite the bang! I wanted to try a number of batches before I took off. Hence, I hosted a 'Homebrew Bash' at my place, a day in which all those interested could come and brew or learn about brewing in addition to helping me consume the excess of beer I'd been hoarding.

It was a great success! We made four beers: old style Dusseldorf altbier, Real Raspberry, Bitter Than You, and a tomato basil beer.


Old World Alt

The old world alt was an attempt to recreate my experience from Dusseldorf the previous summer. I'd tried many American takes on the altbier, but was always disappointed. Something about them seemed to be to strong and scream American microbrew. You can learn more about altbier and the recipe variation that I based mine off of at http://byo.com/stories/item/1205-old-world-alt.

I ended up actually kegging this as a surprise for my friend's birthday party. It turned out quite well, although I didn't hit the taste and lightness I'd hope for. I think my failure was in substituting too much Munich malt. However, it was still a great success and people at the party loved it.


Tomato Basil

This was the concept of my guest brewer, Ed, who'd tried something along similar lines in Japan but did not have the recipe or even name of the Japanese microbrew. However, he came up with a recipe. The process ended up being extremely messy it required a lot of tomato blending, sparging, and then using the basil as a sort of hops. However, all of it was worth it when I tried a bottle... absolutely amazing.

It was the sort of stuff that could easily end up as a flagship beer for a microbrew. Extremely refreshing, filled with flavor, had exactly the right amount of sweetness (I think that was the tomato), and a perfect aftertaste (basil). Either way, I eagerly await future variations on it. Well done Ed!


Tomatoes!

And sparging!

Hops and basil!


Bitter Than You

I'm always disenchanted by various microbreweries' IPAs. It seems that there are so many unremarkable ones out there (although there are certainly a few amazing ones). My theory it's quite easy to make a mediocre IPA, so I decided to put this to the test with a rather unplanned recipe. I bought four different types of hops high on the alpha acid scale and used some pretty straightforward malt combo and boiled for 60 minutes. I hit a total of 240 IBU (note: the max you can taste is 100). I haven't tried any of it beyond two weeks of bottling yet, but it tasted just as I'd expected. Bitter enough to drown out virtually all other flavors. Good though!


Real Raspberry

When organizing the event, I'd asked if there were any recipe suggestions. One of the attendees insisted on a raspberry beer. Now I'd done a peach wheat before with peach extract which turned out well. You'd be surprised at the number of commercial beers that use extracts actually. However, I decided I wanted to try something new and use real fruit this time. About 3 lbs of real raspberries.

The base beer was a simple wheat. The biggest decision I faced was whether to add the raspberries during the boil, or after most of the primary fermentation had taken place. After researching a bit I went with the latter and once the primary looked liked it had stopped bubbling I sanitized the raspberries and threw them in there to reignite the yeast!

Boiling raspberries!

While I didn't get a chance to try a fully ready version, what I tried tasted just as I'd hoped. It definitely had a nice raspberry flavor that was light enough not to overwhelm. However, I hope to soon hear reviews from friends to whom I've distributed the bottles.


In the end, the homebrew bash was a great way to leave town... and I can't wait to try some more of Bitter Than You and Real Raspberry when I make my way back to Boston. In the meantime, I've even left some fun experiments fermenting.

Friday, July 26, 2013

State of the Brewnion

We're over halfway through the year, so it's time to reflect upon my initial resolution, the rule to only drink homebrews at home. Well 206 days... and I'm still going strong!

In fact I've greatly overcompensated for the risk of a beerless household and have brewed far too much. Although, the love of experimentation contributed to the issue as well. Currently I have ~150 bottles that need consumption... but luckily I have friends to help with that.


Let's take a look at everything I've brewed over the past 6 months:

-Chimay Clone
-Anchor Steam Clone
-Berliner Weisse


That's a lot of beers! One of the great things about homebrewing is that it's pretty difficult to screw up beer (barring sanitization), and they all end up tasting great no matter what; even if they maybe different than expected. And with each one I've learned something new whether or not I was experimenting. A truly enjoyable hobby!

Looking towards the future I'm moving across the country in September and won't be able to brew until I've settled in at least. But don't be disappointed... as I'm taking off with a bang (to be mentioned next post)!

Friday, July 5, 2013

Sharing Is Caring

Last weekend I reached the pinnacle of my homebrewing hobby: I shared my beer with numerous people who I'd never met before. I've held tastings amongst my friends previously and they may bring along an unknown person or two, but this was a whole new level. I catered the beer during cocktail hour and dinner at my friend's wedding.

The couple always appreciated good beer and loved every homebrew I had shared with them previously so when I found out about the wedding I figured it would be a fun gift to brew a few batches for the event; an idea which they were quite enthusiastic about.

I set forth to brew a modified pilsner and a Belgian farmhouse summer ale. I won't go into too many of the brewing details, but in regards to the styles I wanted to have a varied selection that matched their respective colors and tastes! However, most fun part was the naming. The groom's last name is Sheiber,so "Sheibier" was an easy pick for the farmhouse ale. Meanwhile the bride's first name is Amy and AmAle seemed to be the way to go for the pilsner (made using ale yeast, not lagered).

The wedding was the true test to the taste of my beer as I'd never met the majority of the people at the wedding prior to the weekend. Both beers ended up on the lighter end, which was perfect for the hot summer day!

Breaking into 5 gallons of Amale and 5 gallons of Sheibier
Smelling Sheibier's aroma making sure it's worthy of consumption
Apparently it was!
And was even deserving of a thumbs + beer bottle up!
The Sheibier was the first to go
And the Amale didn't last much longer either

THE VERDICT: People loved the beer! Rather than calling it quits after one people kept on coming back for more and it didn't take long before the cooler was empty.

The Sheibier was the first to clear out, although my suspicion for this is that my description sounded more exotic in combo with the fact that all the Amale was in 22 oz bottles (rather than the typical 12), which may have intimidated people initially. However once people discovered the Amale it soon became a favorite.

In the end, it was a wonderful experience. One of the few things more fun than drinking your homebrew is watching other people enjoy it, which they certainly did!

I'll leave you with my favorite image from the wedding.

Amy with Amale. Sheibier was already out, so pots were a solid substitute

Wednesday, May 29, 2013

Today I'm Drinking: Not Yet Sunburnt Red

It's been a while since I've written a 'Today I'm Drinking' segment although there are more than enough possibilities to write of. However, I'll focus on what's currently the most standard beer in my arsenal until some of the summer beers are good to go: Not Yet Sunburnt Red (Irish red), recipe courtesy of the Midwest Supplies Living Social starter kit deal.

The recipe can be found here. As mentioned, it came along as part of the promotional deal from Midwest so there wasn't too much thought or investment on my end. There were several recipe options to pick from but I've had good experiences with reds and ambers, so that seemed like the natural choice.

Not Yet Sunburnt Red... soon though!

I'd go into great detail about how this tastes except I can't. It's really bitter. Really bitter! So much so that any other flavor is masked by the hops. It's not a floral hoppiness either. It's quite surprising to me as the recipe consisted of only 1 oz Cascade and 1 oz Fuggles(later in the boil), which sounds reasonable. Cascade has only about ~5% alpha acid and fuggles is around ~5% too, which are both quite low. I don't recall how long I boiled the cascade hops, but that may be the culprit if I left it going for too long.

Although I may seem bitter about the results (sorry, couldn't resist), I'm actually quite pleased with the Not Yet Sunburnt Red. It's very drinkable, not too heavy, and seems like something a lot of microbrews might make.

Saturday, May 18, 2013

Zombie Yeast

A while ago I was asked an interesting question about brewing: do I culture and reuse yeast? At the time I was just starting to brew and the answer was certainly no. Why would I? Yeast wasn't too expensive and I felt much more comfortable following the recipes straight up.

I typically add dry yeast or liquid yeast that comes in a small packet or vial, which will then begin to rapidly reproduce over the coming days. However, it still takes a bit of time to hit the maximum amount of yeast. Often people create something called a starter, where they culture the yeast to a high quantity beforehand in order to kick of with a quick fermentation.

Once the fermentation has finished the yeast has no sugars left to consume; it goes dormant and sits in the fermentor until you siphon the beer out and bottle or keg. What's left at the bottom of your fermentor is giant pile of yeast, called a yeast cake which has already done its job and typically gets tossed. You can see it quite vividly at the bottom of my cider.

However, it is possible to pitch using your yeast cake, reviving it from retirement. I've always wanted to try but was waiting for the right yeast/beer combo, as the previous beer and future beer should similar styles that work well with that particular yeast strain. I was also wary of the sanitization and risk of possible infection.

But the other night I decided to finally take my chances and pitched an odd variation of an ESB (Extra Special Bitter) on top of the yeast cake from my Smoked Efficient Czech. The yeast strain, Safale 05, is a pretty standard yeast and has been used in a number of my previous brews.

I'm a bit worried about sanitization, but am not overly invested in the ESB as it was cheap and intended as a casualty of my experimentation. Luckily, I think I may be overestimating the risk of infection. And the fact that such a high quantity of yeast already exists means that it will get straight to work, hopefully overpowering anything else in its rapid sugar consumption.


Beautiful, right?


As you can see the yeast cake isn't pretty, but it gets the job done! Typically it looks much smoother/cleaner, but not this time. We shall see how this turns out.

PS: If you're trying this yourself, I forgot to mention a couple qualifications I discovered while digging around.

  1. Your new brew should be a higher gravity beer (more malt & sugars) than the previous otherwise it will be considered overpitching.
  2. Use a blowoff tube!
  3. Don't reuse the same yeast more than ~6 times (evolution?)
Anyways, na zdravi for now!

Saturday, April 27, 2013

Two Beers One Night

It had been a while since I spent an entire evening brewing and had a few unused fermenting buckets lying around, so I decided to put myself to the test by brewing two beers in one night! Luckily I carefully chose the recipes to make sure I wouldn't be up brewing until 4 am.

If you look at my recent posts, you'll notice I've been using a lot of darker malts. This has created a problem for me given my New Year's Resolution... I'm not always in the mood for a heavy/darker beer. At this moment, I probably have enough chocolate stout to last me the entire summer. Hence I've decided to start using a lighter variation of malts in future experimental recipes in general.

It also happens that summer is coming, so I decided to take it to more of an extreme and brew both a Berliner Weisse & Pilsner, both of which are beers I have made before.

In the past I've used the Berliner Weisse recipe for a peach weisse, which actually turned out to be quite refreshing. I'm still undecided as to whether I'll modify it before bottling at all. Maybe another fruit beer or maybe just keep it simple.

Either way, the Berliner Weisse was extremely quick to brew. The recipe simplified consisted of 4 lbs of dried malt extract, 2 ounces of Hallertau hops, and White Labs Berliner Weisse yeast. As you can see there are no grains involved, so the only part that needs to be boiled extensively is the hops (and the malt extract for sanitization purposes).

Having set aside the Berliner Weisse wort to cool, I still had plenty of energy left and decided to push forward with my pilsner! Currently I'm down to my last few bottles of the Efficient Czech; really just saving them for special occasions at this point. I did enjoy the prior outcome, so I figured I'd replicate my success... however with a bit more experimentation this time!

I cloned my original recipe except for one thing: I threw in 2 lbs of beechwood smoked malt grains. You may recollect my previous encounter with it with my rauchbier. However, that did not end so well and I didn't get to enjoy a nice smokey beer. My intention is to give this pilsner a slight smokey flavor that doesn't overpower the beer altogether; a lighter version of a rauchbier suitable for the summer. However, it's going to be a fine line, which I may have crossed but hopefully not. I'll find out soon enough!

Time wise, the smoked pilsner was a quick brew as well; the only time consuming process being steeping the beechwood smoked malts. By the end of the brew session, the evening still have plenty of time left!

Wednesday, April 3, 2013

Gushers & Bombs

It's been a little while since my last post; although travelling and other obligations have prevented me from trying anything too wild brewwise recently. However, clearly my beer did not appreciate this and decided to scream for attention... in the form of a bomb.

My variation on a Rauchbier was the culprit. Every bottle of it I've opened has been a gusher; an overly carbonated beer that spills everywhere. It tastes great, but I typically lose about 65% of it to the foam overflow. See it in action below.


As much fun as this seems, I lose way too much beer and run other risks; so let's go over what's happening.

Most homebrewers I encounter typically keg their beer as it's easier and less time consuming. I've almost concluded I'm the only person that actually enjoys bottling. With a keg, you typically force CO2 into it to create carbonation. However, bottling works differently. Before you bottle, priming sugar is added to your batch. This acts as a small amount of additional fuel for the yeast to consume. As the yeast consumes sugar, pressure is created, just as with airlocks during normal fermentation. However, there's no escape for the gas and the pressure builds up creating carbonation.

Typically this is straight forward... until you hear a loud boom and find that a number of bottles have exploded leaving glass shard shrapnel scattered throughout the room. I'm quite glad I was not in the room at the time.

Some of the remnants of the bottle bomb

Due to every bottle gushing and their exploding siblings, something different is happening here. There's too much fermentation occurring inside the bottles. This typically means one of three things. If I added an excessive amount of priming sugar, this may be the result. However, I used the standard amount which I've used with every other beer, so this is probably not the reason.

This leaves two other possibilities. The first is that not all of the sugars were fermented. However, I let the beer in the fermenting bucket for about 6 weeks, which is more than enough time for ale yeast. It could have fallen asleep, but there is no specific reason why it would have. Something like a temperature change could cause that, but the temperature remained consistent. To conclude whether this was the cause, I could have measured the gravity of the beer before fermentation and before bottling. However, I neglected to do so... so too late now.

The third option: during the bottling process, the beer was unintentionally infected by something able to consume the sugars that the beer yeast isn't. Typically, this produces an off flavor; and this beer tasted great.

Hence I have no definitive conclusion, although it's one of the last two: infection or unfermented sugars. The good news is that I learned a lot from this experience. I'll be even more careful with sanitization, use a hydrometer (to measure gravity), and most importantly of all... keep any future gushing beers out of rooms where I spend a lot of time!

Wednesday, March 13, 2013

Honey

It's been a busy few weeks so I haven't had much time to brew. I did however discover that a Boston based homebrewer's club exists (www.wort.org), which was a great experience. I learned so much from the people there, including a few out of the ordinary brewing techniques.

However, last night I finally had the chance to brew again; this time with a recipe I've had since President's Day: the White House Honey Porter. In the past I've brewed the White House Honey Ale, which is currently waiting to be bottled.

The interesting thing to me is that both of the White House Recipes contain honey (given they have their own bee farm).

Not from the White House bee farm

However, I'm honestly not too familiar with using honey in beers yet. I've always wanted to try to make mead, which is honey based. However, the only beer recipe I've used it for previously was a Honey Amber, which actually turned out quite well. But, it was surprising that it wasn't particularly sweet, nor would you necessarily realize that there was honey in the recipe from the taste.

After researching it a bit more, the Honey Amber seems to make sense. The boil time makes a big difference in what the honey adds to the beer. Honey naturally contains a lot of living organisms and bacteria, that give it a good amount of flavor and aroma.

You have to boil the honey in the wort for sanitization. However, if you boil it for 20+ minutes, you are likely to kill off many of the things living in the honey resulting in a lack of that aroma and honey flavor in your beer. However, there will be a good amount of highly fermentable sugar left for your yeast to convert to alcohol.

So it depends what exactly you are looking to do. For my two White House Honey recipes, I used variations which boiled it for about 30 mins, so I'm not expecting a huge honey flavor. However, the original White House recipes suggestion boiling for only 5 minutes. Either way, I'll find out soon enough and I'll be drinking like a president regardless! (recipes below)


Wednesday, March 6, 2013

Today I'm Drinking: The Efficient Czech

I recently found a few bottles of the 'Efficient Czech' lying around. It was actually the first beer recipe I concocted myself back in October. My goal was create an inexpensive pilsner variation with the resources and capabilities I had.

A pilsner is a type of lager which was created in a Czech city called Plzen (actually quite a cool city). Today, numerous beers are based after this style including Pilsner Urquell, Stella Artois, and many American beers.

Now a very important characteristic a pilsner is that it's a lager, not an ale. This is a significant difference in the brewing process. They both use different types of yeast. However, the lager uses a bottom-fermenting yeast and is works at lower temperatures, ~55 degrees for a long period of time (often a number of months). An ale is top fermented at a higher temperature, ~65-70 degrees, and is much quicker process.

For me the implications of this are that I cannot currently create a real lager as I have no consistent location or temperature control around 55 degrees. Since I was also just getting into brewing when I brewed the Efficient Czech, 3 months felt too long to wait for an experiment.

Hence I decided to add all the ingredients of typical Pilsner, but use an Ale yeast. This is where the name 'Efficient Czech' comes into play. The yeast will get the job done much more quickly than a lager yeast. This also plays into many of my experiences in the Czech Republic. If you've ever been there for non-vacation purposes, you will have found that getting even some basic tasks done takes a lot of time. It's a very different pace of life; and although still improving significantly, it's easy to see some of the remnants of the past communist structure. Compared to Boston's fast pace, it seems inefficient, although of course there are tradeoffs.

Anyways, enough about the name, and more about the beer!


The recipe is as follows:
-5 lbs pilsner malt extract
-2 oz Saaz Hops
-Munton's Ale Yeast

It's pretty straight forward. Sticking to one type of malt; the Saaz Hops are grown in the Czech Republic and are used in almost all pilsners. The only wrench I threw in was the ale yeast, which we've already discussed. And all of the ingredients together were quite cheap.

The end result: a pretty tasty and simple beer. It's on the lighter end and very drinkable. The only particularly distinguishing characteristic was the yeasty flavor to it, which a lot of people actually liked. I think I'll actually recreate a variation of this soon so I'm ready for the summer months!

Thursday, February 28, 2013

Today I'm Drinking: Reeb

It occurred to me that I seem to post exclusively about the brewing process, but have neglected discussing the most fun part of the process... the taste and consumption of that beer that so much blood, sweat, and tears (j/k!) went into. Hence I'll be occasionally posting a 'Today I'm Drinking' segment.

On the menu today is a beer that many of you who've followed this blog should be familiar with from the following posts: Experimental Recipe Selection, Explosions!, and Krausen Uprising. The name for this one came quite naturally: Ryan's Explosively Experimental Brew (Reeb).


To get a clear idea of what I'm attempting, take a look at the recipe selection post. It certainly turned out interesting. It has two really distinct characteristics. The first noticeable feature is that it's quite sweet. This was to be expected as I wanted a higher % beer, and they generally end up on the sweet side due to the additional malt. This flavor was pretty apparent, especially as I had leaned towards darker malts.

The other characteristic was the hoppiness, which I had attempted to cut down upon. I think I may have chosen the wrong hops and should have gone with something milder, because they were still quite apparent. And that certainly wouldn't be an issue, but the clash of sweet and hoppy is kind of strange. It's definitely still an awesome beer, but very unusual. If I had redo the recipe, I'd aim for a more guinness/stout like level of hops.

Tuesday, February 26, 2013

Botanical Acids

A technique I mentioned a few posts ago was finally put into practice over the weekend: dry hopping. It's the process of adding hops to your brew after the primary fermentation has taken place.

The purpose of this is to give your beer even more a hoppy aroma and flavor. If you've ever tried IPAs or other beers with a floral taste, dry hopping is probably the culprit. However a significant characteristic of drying hopping is that it doesn't increase the bitterness of your beer. Essentially you're grabbing the flavor of the hops without adding bitterness.

The reason behind this is the way in which hops bitter beer. Each variety of hops has something called an alpha acid rating, which signifies what % of the hops is alpha acids/oils. The more alpha acids, the more bitter a beer will be. However, this relates to dry hopping because alpha acids are only released when the hops are boiled. Since there is no boiling taking place with dry hopping, no alpha acids are released and the beer is not bittered at all.

Alpha acid 5.7%

Alpha acids during boil actually plays a big role in recipes. Oftentimes they'll call for multiple varieties types of hops, one boiled for a long time for bittering and then one boiled minimally for flavor. For example, the White House Honey Ale recipe (which I brewed in honor of President's Day) calls for Kent Goldings hops to be boiled for 45 minutes, then the fuggles for just the very last minute.

Anyways, back to my dry hopping experiment. I created a pretty simple pale ale as the base. My main decisions were in the hops to use. During the boil, I went with warrior hops, which have an extremely high alpha acid rating of ~16%. They are commonly used for bittering purposes, especially in IPAs.

For the dry hopping, fuggles were the hops of choice as they were one of the suggested varieties and add an will give the beer an earthy flavor/aroma. As you can see above, the alpha is 5.7%, which is significantly lower than the warrior hops; but I'm using them both for different purposes.

You can get whole hops, but the pellets work just as well

Anyways, the process was quite simple, as I just cut the bags open and threw them into the fermentor. There are other methods involving strainers, but this was fine for a first attempt.

Now just a couple final things to note. One of the first thoughts that came to my mind was sanitization, which is the most important part of brewing. Everything that ever comes into contact with the beer is sterilized via boiling or otherwise. However, we're not boiling these hops... and I'm certainly not going to soak them in a sanitizing agent; so adding them sounds like we might be asking for an infection.

However, we do have a few things going for us. The fermentation has already taken place, so the sugars consumed and an alcohol content already exists. The hops come from clean packaging conditions (taking the open photo was actually probably the biggest risk, as minimal as it may be). Importantly, hops have anti-bacterial characteristics and were initially added to beer to act as a preservative. That preservation maybe one of the main reasons IPA (India Pale Ale's; Indian climate/distance) are so hoppy. However, that's a history to explore another day. Anyways, given all of these factors, dry hopping should be safe.

A final point I should highlight is that the hops should be left in for less than a week. If longer, they apparently start to give off too much of a grassy flavor. Hence, I'll be bottling this brew in less than a week and let you know how it turns out!

Thursday, February 21, 2013

Not Quite Moonshine


I'll start off with a .gif of very active fermentation. Since my last experiment (cider) non-beer experiment was completed, it was time to try something new. While browsing beer-wine.com, I found something interesting: 24-hour Turbo Yeast.

When I started brewing, I always had wanted to see what happened when I threw yeast in with sugar or kool-aid. However, after researching it, there were a few issues. First, yeast is like us... it needs nutrients. It cannot live off sugar alone. When brewing beer, this is typically not an issue as the malts contain the necessary nutrients. Also, my kool-aid idea wouldn't work either because some of the chemicals in it would hinder the yeast.

However, what was included in this Turbo Yeast packet was everything needed for fermentation except for the sugars. Nutrients included. Hence, this project was pretty easy. All had to do was boil 6 lbs of sugar and sterilize the carboy, then add the yeast when ready.

The idea is that it will be at 14% in a 24 hrs. The .gif above was taken at about 16 hrs. It's difficult to see and I didn't have too much time to setup the shot, but the top layer of the carboy is fizzing like crazy. Later on, the bubbles grew a lot larger as well.

It should be ready by now, but I don't really know what to expect. I will certainly need to add some sort of flavoring I think. The carboy was quite cloudy last time I checked, so I'm also wondering if I want to let the yeast and nutrients sink to the bottom, then harvest it. Either way, I'll taste it and make a decision soon.


PS: An interesting point on the packet instructions were to avoid using an airlock. I was trying to think of the reasons behind this. One could that it was so active, it would almost certainly cause a blowoff. The lack of an airlock brings up the thought of contamination. Typically contamination happens when other yeasts from around the atmosphere find their way into your beer. However, my theory is that this yeast is so fast acting and powerful, that it muscles the other potential yeasts out. Also, the final product is done so quickly that there's little time to become contaminated.

Thursday, February 14, 2013

Shopping

One of most frequent questions I get about homebrewing is 'where I get my ingredients?' That's a reasonable question since most of the ingredients can't easily be acquired at a typical store. You could try and use bread yeast, but I've heard the results are quite terrible. Up to this point, I've only purchased supplies from 3 different homebrew stores; but they've all left lasting impressions.

About ~5 years ago, when I first attempted homebrewing I began with a Mr. Beer kit, which led to me wanting to try a second batch as well. I found my way to the nearest homebrew store, the Homebrew Emporium by Davis Square, Cambridge, MA. I was in for a surprise, as the employee I encountered was about as rude as possible. When soon as he picked up on the fact that I was a homebrew noob, that was it. I came in looking for some guidance, figuring out what I wanted to brew and how; but left with the unpleasant aftertaste of a condescending, unhelpful employee.

When I got back into brewing again 6 months ago, I certainly didn't forget the previous experience and checked yelp to see if anything had changed. However, after reading a few reviews... it sounded like I had actually been treated quite well compared to some of the other customers; so I definitely wanted to avoid going back there if possible. Luckily, I was able to find another brew store out in Woburn, MA, Beer & Wine Hobby.

It was a little bit farther out, but the difference was unbelievable. The woman who was working there was exceptionally friendly and started to help out with everything once she realized I was new. It was definitely an awesome experience, and I left a happy customer. Even the space was such a contrast in terms of clutter and visual aesthetics. Given, Woburn is much more spacious that Davis square, but the atmosphere just felt so different, so Beer & Wine Hobby quickly became my goto homebrew store. I even realized that it was one of the better and 'cheaper' online stores as well. They have a great site that's a fun to pick out recipes with. And even better, virtually everything I order from them online arrives at my doorstep within a day or two because it's just down the Mass Pike. The Beer & Wine Hobby and Homebrew Emporium sites are incomparable; although I don't think Homebrew Emporium is large enough to do a huge amount of business online. However, it still would be a wise marketing choice to rebuilt their page. Interestingly, I've heard tons of radio ads for them on WBUR( Boston's NPR station) recently.

Now, despite my reluctance I have returned to the Homebrew Emporium after having gained a bit more knowledge about brewing. The employees I've run into there recently are a lot younger and more friendly than the previous guy. Some are a little bit aggressive/overwhelming still but they definitely have the intention of wanting to help you out; so I've actually managed to learn a bit from them. In the end, if I need an ingredient or equipment quickly, I'll just drive over to Homebrew Emporium. If an item is not time sensitive, I'll order it from Beer & Wine.

Interestingly, I actually saw the employee of my previous experience featured in the following Boston Magazine article. He looks/sounds way more friendly in the article; but who knows... maybe he was just having a bad day the one time I walked in?

I've only discussed to stores up to this point, but the third is intertwined as the other two are. It's an out of state, rather large online brew store: Midwest Supplies. I'd never ordered from them previously, but their Living Social deal was too good to turn down. My friend had ordered a kegging system from them a few weeks earlier and mentioned that they had forgot some components and had to reship them. However, I figured it was probably a fluke.

Fast forward a few weeks after I purchase the deal... I'm in Boston and the massive snowstorm Nemo is getting ready to hit. Work is cancelled Friday, and I know it's going to be a long weekend indoors; so I'm about the run over to the Homebrew Emporium and pick up a recipe before I stash my car away in a garage.

However, I'm in luck... as I head downstairs, my Living Social Deal is waiting there so I now have an Irish Red Kit of theirs to brew! Later that day I'm unpacking all of the contents of the package and I look at the ingredients in the recipe. I see everything, except I can't find the yeast!!! It's pretty much the one thing you actually need to brew >_<. Not so lucky anymore...

I know that Midwest has an account on reddit.com/r/homebrewing, so I write a quick post asking whether I've just missed the yeast somewhere (although I checked pretty damn thoroughly) with the secondary goal of grabbing Midwest's attention. Within 15 minutes I have a response and phone # from a Midwest employee named Todd! I give him a call and explain the storm situation to which he happily says he's going to 1-day ship the yeast due + additional packets out to me and beat the storm.

In the end, the storm beat the yeast as the roads were completely shut down for pretty much 2 days. However, I do now have backup yeast for any similar mishaps in the future... and a Midwest Supplies hat to keep me warm for the rest of the winter.

Dealing with Midwest was a pleasant experience and I'm impressed by the fact that they are smart enough to be on reddit.com/r/homebrewing listening to the community. However, I guess they do need to pay more attention to details because an 0 for 2 count between my friend and I isn't the best. In the long run I think I will continue to use primarily Beer & Wine Hobby for my online orders as the shipping time is so quick and I want to keep them in business.

TL;DR - Don't go to Homebrew Emporium unless you already have somewhat of an idea about what your doing. Beer & Wine Hobby is great and the people are friendly; good to go to & order from online. Midwest Supplies is really friendly and community aware but need to be more careful with orders.

PS: Sorry, I didn't have any exciting brewing images this time... so have a picture of some shiitake mushrooms I grew instead.


Monday, February 11, 2013

Waiting For Fermentation

Over the recent storm, I started my next batch of beer which shall be a pretty standard IPA. This time I'm planning use a technique called dry hopping, which is the concept of adding hops in after the initial fermentation has completed for a nice aromatic flavor. I discuss it more in detail in my next post.

However for now I must wait as the fermentation works away; as is visible by the airlock below.


Monday, February 4, 2013

A Deviation Of Sugars

About a month ago I was thinking about all the cool things I could ferment and wondering about them, which eventually led me to a simple, but potentially fun shift from beer: organic apple juice and yeast.

I hand picked the yeast Lalvin EC-1118 after reading some of the of the description. A key factor was it's tolerance of up to 18%, so my hope was that it would consume all the sugar in the apple juice with ease. So off to the store I went and bought 3 gallons of organic apple juice was poured directly into the carboy (skipping any wort boiling process), followed by my hand selected yeast.

Now this concoction is actually cider; and I am not a cider fan, but it was simple and fun to try. Plus I had my glass carboy lying around unoccupied, which actually gives a cool view into the process as it's taking place.

A view inside

Initially it was quite cloudy it was working away, but as the fermentation was finishing the yeast fell to the bottom.

Layer of retired yeast at the bottom

Due to the lack of anymore activity, I decided it was time to bottle this weekend, which meant I was going to taste it as well. Not surprisingly, it tasted like cider. The surprise was its champagne like characteristic. Frankly this should not have been much of a shock due to the fact that Lalvin EC-1118 is primarily used as a champagne yeast. However it will certainly be interesting to see how it compares to champagne after the carbonation has occurred.

Tuesday, January 29, 2013

Smoked Malts & Super Yeast

As I mentioned in this previous post, I wanted to try brewing with more grains. Hence, I decided to put together a recipe for the rare and elusive rauchbier using a lot of grains. This fit, because the the smokey flavor of a rauchbier comes from the smoked malts. As my buddy described, it's "like drinking a campfire." Kind of like an Isle of Islay scotch.

The result was:
3 lbs of cherrywood smoked malt
1 lb of beechwood smoked malt
3.3 lbs of liquid munich malt
3.3 lbs of liquid dark malt (I accidentally had ordered an extra one of these with a previous batch, so it fit in here)
2 ounces of Hallertau Hops (I was thinking of Mt. Hood for a spicy more spicy sort, but Hallertau seemed to be most common in other rauchbier recipes; hops chart)
1 vile of liquid White Labs San Diego Super Yeast

I still have yet to purchase a good grain mill; however, I noticed an option to pre-crush the grains at purchase, so I decided on that. As you can see, they did quite the job milling the grains below. Much better than my ziplock bag and wooden block.

Crushed!

When boiling the grains, you typically use something called a muslin bag, to allow the grains to steep while being easily removable. Luckily, I still had several large muslin bags lying around, as I certainly needed it with 4 lbs of grains. It was definitely the most I've stuffed one so far.

Giant muslin bag

Typically at the start of a boil, I add to gallons of water to the brewpot, so I stuck with that trend this time. After boiling and removing the muslin bag, I realized that there was only about 1 gallon left, meaning the other had been soaked up by the grains and bag.

Now the typical solution to this is something which I've done in the past called 'sparging', which would have allowed me to regain a lot of the sugars  and good liquid. However, by the time I realized how much I'd lost, the muslin bag was already in the waste. Hence, I'm hoping I still am able to achieve good amount of the smokey flavor, despite the lost juice.

An additional change I made to my custom recipes this time was picking a liquid yeast, this one being called White Labs San Diego Super Yeast. The choice behind this was, I've heard good things about White Labs and this one had a somewhat high optimum fermentation temperature between 65-68 degrees, which is where my closet is usually at during the winter.

Super yeast!

Typically I get dry yeasts, but this one was liquid, which you have to be slightly more careful with. However, from what I understand it doesn't make a huge difference whether it's a dry or liquid yeast in the long run. The final reason which I went for the San Diego Super Yeast was because it's a very active yeast, which means that my closet would be doomed with yet another explosion of krausen if I did not setup a blowoff tube. So I did, and although it's not as fun to watch bubble as a typical airlock, you still witness plenty of bubbles as the super yeast works away.

Monday, January 28, 2013

Krausen Uprising

Saturday was a very productive beer day which involved brewing a new more complex beer (to be described in an upcoming post) and bottling the previously explosive experimental recipe.

For those interested, here what the interior of the explosive fermentor looks like. You can see the ring around, where the krausen rose until it blew the lid and everything else off.

Krausen uprising
In the end, the beer tasted fine, so it likely avoided any contamination. Hence, it should be good to go with a review in a number of weeks now.

Wednesday, January 23, 2013

Newest Experiment Soon To Be Released

I've just ordered my next custom experimental recipe. I'll keep it a secret for now; but it should be pretty cool and challenge me this time!

Tuesday, January 22, 2013

Stouts & Grains

Since I have to keep the cycle of beer going, it was time to brew again the other night. I had a chocolate stout recipe and ingredients that had been laying around, which I'd bought on sale a while ago. It was  tried and tested recipe by the people at beer-wine.com, so not too much of my own creative input went into the recipe.

Now I have a bit of history with chocolate stouts. Both recently, and about 5 years ago (when I first tried brewing), the wort boiled over the pot, leaving a sticky mess of malt over my stove to clean up. It's never happened with any other brews. However, chocolate stouts have it out for me. You'd think I would have learned after the first time, but nope... the score currently stands at Ryan: 0, Chocolate Stouts: 2.

Hence I was especially careful this time to ensure my victory over a chocolate stout. I kept the boil temperature on the low end while checking on the wort frequently, which led to an unscathed brewing session this time.

Now interesting about this recipe is the use of grains; which I don't have an extensive knowledge of yet. If you take a look at my previous experimental recipe, it's all malt extract and lacks any full grains. However, take a look at the grains used in the chocolate stout below. Tons. In fact, the use of chocolate malt is what defines the chocolate stout.


There's a couple of reasons I've stuck to malt extracts with my own recipes so far. The main one is that I wanted to start simple, and expand my knowledge from there. The other main reason is I do not yet have a grain mill, so I use a caveman method to crush the grains, as depicted below.


My hi-tech method


I put the grains in a plastic ziplock and use the wooden block to repeatedly roll over the grains until the grains look crushed, or my arms give up. If I owned a rolling pin, that would be a good solution as well; but I've been looking into buying a grain mill at some point soon. The problem is all of the half decent ones are quite expensive, so I'll have to research thoroughly before purchasing.

Anyways, I think in future recipes of my own, I'll start to incorporate more grains for a more complex and interesting beer. One that might be quite cool to try is some smoky grains, so I end up with something along the lines of a rauchbier. We'll see though!

Tuesday, January 15, 2013

Next time...

Well... last week I spent a good amount of time scrubbing the walls after the previous explosion, so time for some conclusions. Apparently the foam which rises during fermentation causing everything to blow off is called Krausen, as explained here.

My thoughts are that in an attempt to make a more alcoholic beer by increasing the amount of malt, I may have doomed myself. The yeast was busier due to the extra sugars to consume and hence there was more krausen; to the point where even the plastic carboy could no longer take it.

If I were to try the same recipe in the future, I might get a slightly larger carboy so that there's more space for the krausen to rise.  I'd also definitely want to try a blowoff tube setup.

However sometimes disasters are unavoidable even for the best of us; as can be seen in the following set up images from /r/homebrewing: http://imgur.com/a/DYlo6 ... an exploded fermentation tank that makes my losses pale in comparison.

Thursday, January 10, 2013

Explosions!

Well it didn't take long for things to happen. Last night I went to check on my most recent brew. However, upon opening the door I saw what looked like a bomb explosion in my closet. The airlock had flow off as well fermentor lid. Apparently the yeast was quite angry! A look at the destruction below.

The lid was actually blown off it (I put it back on temporarily to prevent the likelihood of contamination)

The closet door, which could possibly be considered art now, signed by 'yeast'
Some of the content which overflowed everywhere; essentially mushy malt
The airlock, which couldn't hold back everything, and flow off along with the fermenter top


Now something similar happened to me before when I was brewing an ESB (extra special bitter). During the first few days, the beer rose and clogged airlock, which eventually blew off due to the pressure. It sat in such a state for several weeks actually before I went down to the basement to look at it.

I decided to let it finish brewing hoping that it had not become contaminated. After reading around a bit, it seemed there was a high chance that the layer of carbon-dioxide being produced by the fermentation would prevent any contamination. Plus my thought was 'beer never gave up on me, so I'm not gonna give up on beer!' In the end it turned out to be a great brew, which a lot of people liked.  Plus it pretty much named itself in the process as Explosively Special Beer.

The ESB's airlock clogged with hops

The ESB's dried risen hops, up to the level of the airlock's former location
From my ESB experience, I learned quite a bit actually. First of all, I probably didn't leave enough air at the top of the carboy. Secondly, using a glass carboy for primary fermentation may not have been the best decision. In the case that a glass carboy is used, something called a 'blowoff tube' setup would actually be preferable to a standard airlock. Having learned these two thing, I figured that I'd stay away from glass carboys for primary fermentation and would be fine.

However, apparently that's not the case as my closet will testify. If you take a look at my last post, you can see the ingredients used in the current batch, which is quite possibly one of the main reasons I'm cleaning up a giant mess right now. I have a few other thoughts as well, but will research it a bit more and share my conclusions next post.

Either way, I put a different lid back on the fermentor (since the old one was messy and actually had the rubber lining blown out of it too) and since then the airlock has been bubbling rapidly still, so the yeast is still busy at work!

Wednesday, January 9, 2013

Experimental Recipe Selection

I did in fact end up brewing last night, which worked out quite well. Hence, I'll explain my experimental recipe and thought process.


The ingredients: 3 lbs dark malt, 5 lbs amber malt, 1 oz Chinook hops, 1 cinnamon stick,  and standard ale yeast
Most of the beers I've brewed in the past have used about 5 or 6 lbs of malt (for 5 gallon batches), which is pretty normal for beer and leads to a fairly standard alcohol content level. However, this time I wanted something stronger, so I hopped on a cool tool called BrewLab (I wish I had discovered this earlier) and started trying out different mixes.

Anyways, I went with an amber/dark mix, since I've had good results with ambers previously. In all a total of 8 lbs of malt. Malt is essentially sugar which the yeast consumes and converts into alcohol, so the more malt the higher alcohol content up to a point. Using the brewlab calculator, this should be about 5.7% or so, which is higher than any of my previous creations.

In terms of yeast, a basic ale yeast would suffice as it's quite cheap and I haven't worked with other yeasts too much yet. I'll have to start experimenting with them in the future. However, a beer is not necessarily complete with just malt and yeast! One time I brewed with no hops, which was still quite good, but tasted more like a cider than a beer almost.

With my last few batches, I've picked fairly bitter hops and over-boiled them leading to very bitter beers. This time I wanted to balance it with hops aroma more as well, so I took a look at the following hops chart and decided on Chinook hops, which I haven't worked with before; but seemed aromatic and still quite bitter. I also decided to reduce the amount of time I'd boil the hops in order to lower the impact of them.

However, a recipe is not 'experimental' until you throw something random in there, which is where the cinnamon stick comes in!  Reading up on it, too much cinnamon can destroy a batch.  Some people seemed to use cinnamon powder, while some just left the stick in for a few weeks during fermentation. I however, decided to boil 1 cinnamon for the last 15 minutes, then remove it; hoping it will add a really mild touch to a darker/amber beer.


The brew process ended up going smoothly, so I'll keep you updated!  Haven't thought of the perfect name yet, but it will come in time.


Tuesday, January 8, 2013

Tonight

is going to be a brew night, with an experimental recipe I created.

Thursday, January 3, 2013

The Resolution

It's been on my mind for a while. I've been planning it for the last few months. Long before January 1, 2013, I know what my resolution was going to be:

To consume only my homebrew at home

That is my goal. There are many reasons I think it's a good resolution. I enjoy homebrewing a lot, so this will only encourage it. It will force me to master (or at least attempt to) the art of homebrewing. It will make me appreciate outside beer when I have it a lot more than I might otherwise. It will save a bit of money; not a significant amount, but definitely some.

Since it's January 3rd as I type, the trial has already begun.  There are several rules and exceptions which are set.  If I'm at a bar or somewhere externally, I am allowed consume whatever they have there as I don't have the capacity to carry my homebrew wherever I go.  If I am going to be hosting a party that hasn't been planned for in advance, other people are allowed to bring beer, as if this was not the case, a party could quickly dry me up.

Since it takes roughly 6 weeks for most beers to be ready from the initial brew day, I plan to always have something fermenting and bottling.  At the moment, I have a chocolate stout fermenting, some custom experimental ingredients of my own on the way, and last night I bottled a honey amber.  A couple pics from the bottling process below.


The syphon setup

A closer look at the active syphon
Anyways, it should be a fun year and resolution to stick by.  Na zdravi!

Wednesday, January 2, 2013

Introduction

I've always been a beer person. Being half Czech, it's in my blood. I've always loved microbrews, and started visiting a lot of microbrew festivals which are always amazing!

I tried micro-brewing about 4-5 years ago with a Mr. Beer Kit and slightly more advanced brewing kit, which turned out well both times; but for some reason I chose not to pursue it further. However, recently my family was cleaning out their house and stumbled upon the remaining primary fermentor and gave me to option of picking it up or tossing it out. Hence, I took the former and threw it in my trunk.

I let it sit there and roll around for a few weeks until I got tired of hearing it thud when I'd take a sharp turn, and decided to start brewing again. A decision to master the art of brewing, to the point where I can experiment and shape the way I want my beer to taste. I've got a lot to learn, so I've gotta get my practice in. Since there, I've become addicted to homebrewing and have created a nut brown, celtic red, peach weiss, and experimental malt only beverage with many more on the way.